Sunday, November 23, 2008
A Fun Distraction - First Sight Book
So in the midst of frenzied holiday gift sewing (some gifts have already been given out early in fact) I stumbled on this cute Michael Miller First Sight fabric. I wasn't sure what exactly I was going to make with it, but it jumped into my Etsy cart anyway. When it arrived I saw the squares were too large for a block (well actually maybe a soft taggie block would work well, but not stacking blocks.) I considered just making a little blanket since I already had red satin binding and red minkee to back it, but really we're swimming in blankets here! Then I thought to make a soft fabric book out of it -- perfect!
There are 12 different squares, but I also added a minkee back cover and made one more square out of the checkerboard border, so 14 sides in all. I added the satin binding plus a loop. The cover pages I used fusible fleece on (makes it a tad stiffer than just batting, and I think it's what makes the book stand up so well which is a feature I love), the interior pages have batting inside except for the center page which has some cellophane too make it crinkly. I think it turned out so cute. :)
Here is baby Ben modeling:
Saturday, November 15, 2008
A Quick Sneak Peak
Color color color! I love how these pieces look all laid out and I'm sure they are going to look so fun all assembled! Unfortunately, I won't be sharing the finished project until after the holidays since it's a gift.
I'm really gearing up for all the holiday gift sewing now. Lots of projects are cut and ready to sew, more are planned and yet to be started. The only problem is not getting *TOO* distracted by other random projects that catch my eye. I saw (and bought of course) this Michael Miller First Sight fabric and now I need to made a cloth book for my littlest one. I'm a sucker for all kids prints lately -- I need to stay off the fabric sites and use up some of the stash!
Don't worry, to keep from getting too empty here I'll be posting about some fun gifts I've made in the past: I-Spy bags, crayon keeper, car playmat. Stay tuned...
Wednesday, November 5, 2008
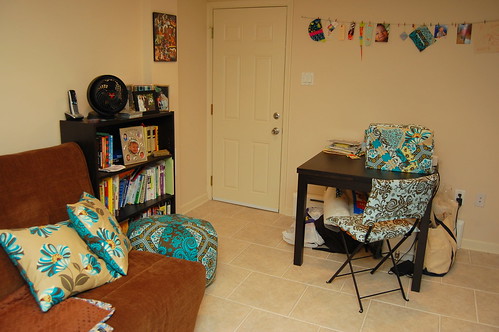
Sewing Space Makeover
My sewing table is in my basement and I've made lots of projects with Amy Butler Nigella prints for it so far (and someday, maybe, hopefully I'll finish the quilt for it!!)
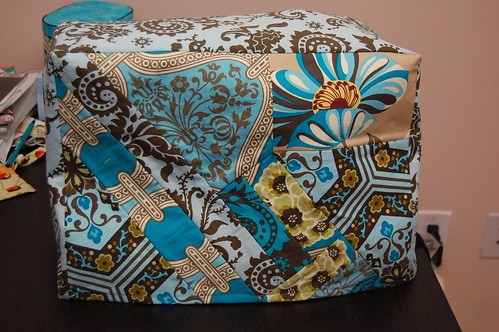
I still had plenty of fabric leftover so I made some cushion covers and a machine cozy!
The chair has removable cushions that were purple velvet. Not bad, but they were getting old and dingy anyway. I decided just to cover them over.
The sewing machine cozy was so fun! I used the instructions from Spool Sewing, modified just a bit for the dimensions of my machine. For the front I just went through my scrap bag and started laying out pieces. It was fun! Piecing bits into strips and then piecing the strips together isn't hard, you just have to have an idea of which pieces to sew in which order! The sides, top and back are just the solid print. I added a light interfacing behind the pieced front just to keep all the seams neat and from snagging anything on the machine. I also added a pieces of fusible fleece on the inside of the top piece. I really like the shaping it added, I may add the fusible fleece to the remaining pieces too. I'd like it to basically stand on it's own.
More pics of my space, with my "inspiration wire" over my worktable -- just bits of fabric, pictures, ideas and cute things.
And just because I *LOVE* to look at it, my fabric stash
Subscribe to:
Posts (Atom)