Happy Holidays everyone!!
I actually got all my sewing done with a WHOLE day to spare! :)
My goal was to make a handmade item for each child on my list - my own, nieces and nephews, and friends' children. This year was a baby explosion so the list almost doubled!
Here is one gift I made for 2 of my nephews - Dilbert the Dino! This is a Melly & Me pattern (yes, yes, I need patterns for almost everything, even stuffies).
I thought they came out so adorable. I won't lie -- those spikes were pretty ugly to turn inside out but once you power through that step you're almost done anyway.
For size comparison - next to baby monitor. They are a nice size!
Friday, December 26, 2008
Thursday, December 11, 2008
Why not squeeze in an extra project or two? High chair cover is done!
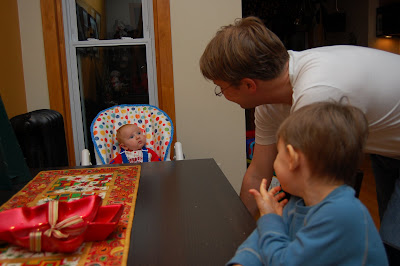
Little Ben isn't quite ready for solids yet but we wanted to get him used to sitting at the table with us for dinner. Our high chair's original cover was cracked from repeated washings and I already had the Michael Miller Play Lolli Dot laminate and Michael Miller bias trims waiting around so another project got squeezed in among all the holiday gift sewing.
I started with the original cover as a rough pattern, but I did make a lot of adjustments and changes. Most were just time- and effort-savers, I mean WHY did the cover need 18 different ways to attach to the plastic seat? The orignal had a ruffle (blech) and an odd bottom shape, those had to go. The bias trim I though would be cute and colorful, plus it's a really quick way to finish things!
Monday, December 8, 2008
Fleece hats, scarves, mittens -- oh my!
I am not doing a handmade-only holiday, or even close to it, but I do love to give handmade things when I can, and particularly to the ever-growing list of babies and kids in my life. Maybe it's because they are less likely to be critical of a crooked seam. ;-)
Since these have already been given out I'm free to share them here now! I wanted to get these done early so that they could be used the whole winter season. I made seven sets of these. I didn't intend to make mittens too, but after I made a pair for my son Nate I really liked how they turned out, and they were pretty fast. First some pictures then some details for anyone else interested in making some.
The pink girl set with kitty cat scarf:
All my kitties:
Boy set with bunny scarf:
My model:
And now some sewing info...
SCARF -the pattern is from the book Cute Stuff. Even though the directions are really just cartoons I don't have any tips or changes to add here.
HAT - free pattern from the Martha Stewart site! I do have some tips for these:
* make sure the stretch of the fleece goes around the circumference of the head
* if you intend to join the top in a pompom (as I did for the girl set above) add 1 to 1.5" to the height. I didn't add any to the instructions on my first one and it wasn't tall enough. This one became Nate's and I just cinched the corners up to make "ears", also a cute option.
MITTENS - free pattern here. It's not a quick just print and go pattern, it's a small one on a grid that you use as a guide. I used a grid with 5/8" squares for the toddler/pre-schooler size. There is a flaw in the pattern though, if you add up squares on one side it's 8 and on the other side it's 9, you need to either lengthen or shorten one side.
Wednesday, December 3, 2008
The Toddler-friendly Tree
I love beautiful, ornate, delicate glass ornaments.
But glass and little ones don't mix well. So almost all of our ornaments have now been replaced by soft kid-friendly ones. Much safer now, and pretty cute too.
I made a big batch of these last year:
Here are this year's additions -- stockings:
And more of the Spool birdies - I just added ribbon loops and they are perfect as ornaments!!
An "action" shot of our tree:
Since we're in a holiday mood now, here is this year's picture with Santa (yes that as good as it got, Ben was not cooperative and Nate was a bit smiled out after family pictures earlier.)
Sunday, November 23, 2008
A Fun Distraction - First Sight Book
So in the midst of frenzied holiday gift sewing (some gifts have already been given out early in fact) I stumbled on this cute Michael Miller First Sight fabric. I wasn't sure what exactly I was going to make with it, but it jumped into my Etsy cart anyway. When it arrived I saw the squares were too large for a block (well actually maybe a soft taggie block would work well, but not stacking blocks.) I considered just making a little blanket since I already had red satin binding and red minkee to back it, but really we're swimming in blankets here! Then I thought to make a soft fabric book out of it -- perfect!
There are 12 different squares, but I also added a minkee back cover and made one more square out of the checkerboard border, so 14 sides in all. I added the satin binding plus a loop. The cover pages I used fusible fleece on (makes it a tad stiffer than just batting, and I think it's what makes the book stand up so well which is a feature I love), the interior pages have batting inside except for the center page which has some cellophane too make it crinkly. I think it turned out so cute. :)
Here is baby Ben modeling:
Saturday, November 15, 2008
A Quick Sneak Peak
Color color color! I love how these pieces look all laid out and I'm sure they are going to look so fun all assembled! Unfortunately, I won't be sharing the finished project until after the holidays since it's a gift.
I'm really gearing up for all the holiday gift sewing now. Lots of projects are cut and ready to sew, more are planned and yet to be started. The only problem is not getting *TOO* distracted by other random projects that catch my eye. I saw (and bought of course) this Michael Miller First Sight fabric and now I need to made a cloth book for my littlest one. I'm a sucker for all kids prints lately -- I need to stay off the fabric sites and use up some of the stash!
Don't worry, to keep from getting too empty here I'll be posting about some fun gifts I've made in the past: I-Spy bags, crayon keeper, car playmat. Stay tuned...
Wednesday, November 5, 2008
Sewing Space Makeover
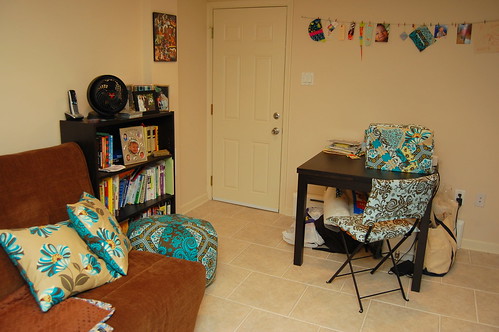
My sewing table is in my basement and I've made lots of projects with Amy Butler Nigella prints for it so far (and someday, maybe, hopefully I'll finish the quilt for it!!)
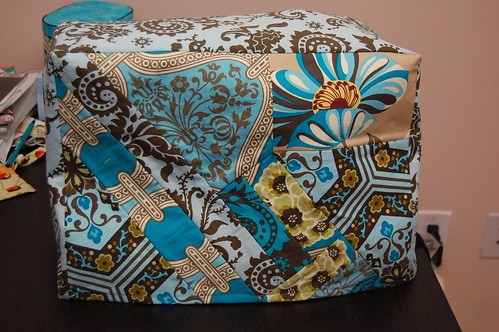
I still had plenty of fabric leftover so I made some cushion covers and a machine cozy!
The chair has removable cushions that were purple velvet. Not bad, but they were getting old and dingy anyway. I decided just to cover them over.
The sewing machine cozy was so fun! I used the instructions from Spool Sewing, modified just a bit for the dimensions of my machine. For the front I just went through my scrap bag and started laying out pieces. It was fun! Piecing bits into strips and then piecing the strips together isn't hard, you just have to have an idea of which pieces to sew in which order! The sides, top and back are just the solid print. I added a light interfacing behind the pieced front just to keep all the seams neat and from snagging anything on the machine. I also added a pieces of fusible fleece on the inside of the top piece. I really like the shaping it added, I may add the fusible fleece to the remaining pieces too. I'd like it to basically stand on it's own.
More pics of my space, with my "inspiration wire" over my worktable -- just bits of fabric, pictures, ideas and cute things.
And just because I *LOVE* to look at it, my fabric stash
Thursday, October 30, 2008
Toddler Hats
First off, Go Phillies! World Series Champs!!!!
We have a serious lack of Phillies gear in the house, so I dug out my out-of-print Phillies fabric and made a cap for Nate! I just came across this tutorial from Made by Petchy yesterday so it all just came together perfectly.
Blue one is fleece with a center panel of On a Whim Owls. I put a layer of fleece behind the owls too. It's not reversible and I used some bias tape for the edging. I skipped the elastic on this one.
Red twill one has Phillies (woohoo!) on one side and a bit of Michael Miller Guitar fabric on the reverse. I almost cried with joy when I saw that I had a scrap of the guitar print just big enough for this.
My model:
Tuesday, October 14, 2008
I got a new camera!
Woohoo!
Getting a picture of my 2.5 year old is just getting impossible. He doesn't smile for pics, but most of all he doesn't stop moving! My husband suggested I go ahead and get a digital SLR since I figured I'd get one at some point, but which one to get? I'm notoriously terrible at over-researching and taking forever to make a decision on purchases like this. Fortunately I read this site kenrockwell.com that just made 100% sense to me and I was done! So I got the Nikon D40 and already I'm much happier with the vastly improved responsiveness. I also picked up the recommended external mount flash (SB-400) and I'm just about giddy about how my indoor shots look now. My living room has particularly bad lighting but of course that's where I'm trying to take pictures all the time. I can't wait to see how actually, you know, learning how to use the camera helps even more! :)
A few pics:
Tuesday, October 7, 2008
Pretty Pillowcases!
I just LOVE the new Heather Ross Mendocino line. But I had a very hard time figuring out what I wanted to make with it! I'm all stocked up on fabrics to make bags or skirts or PJs for me ... I didn't see making something with it for my boys... and I loved the way the different prints looked together too.
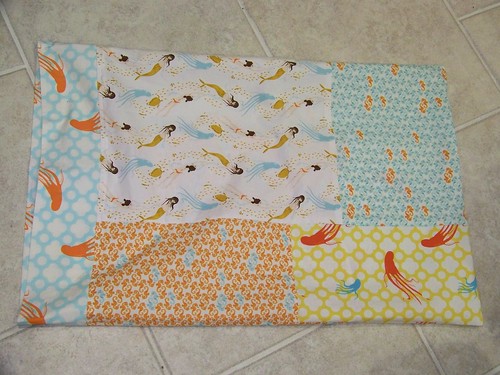
Then I saw a great little half-yard bundle from Fabricworm on Etsy and I realized they would look great with my orange duvet cover! So a few half-yards headed my way and I made pillowcases! Each side of the two pillowcases varies a bit with the four inside fabrics in different spots.
All cut and laid out:
All done!
Action pic with the rusty orange sheets & duvet:
I'd never had pretty or even interesting pillowcases, they always have just match the solid sheets. It seemed like a frivolous project at first, but I can see making more. It's so nice to see your handiwork first thing in the morning (or for me, every time Ben wakes up to nurse!)
Friday, October 3, 2008
A project for baby & mama!
A new baby needs new carriers to snuggle in right? ;)
I bought a snuggly wrap, chopped it in half, dyed it blue and turned it into a ringsling! I'm so happy with the color (I'm not a dying expert!) and the sewing for the ringsling shoulder is very simple. Here are some instructions for sewing a gathered shoulder BTW.
Action pic:
With the undyed other half of the wrap:
Wednesday, September 24, 2008
I'm Back and Ben is Here!
Born 3 weeks early, Benjamin Matthew joined our little family! He's a tiny sleepy guy so I've actually gotten a few moments to sit down at the sewing machine too.
The To Do list got thrown away and I had to make the little guy some things. :)
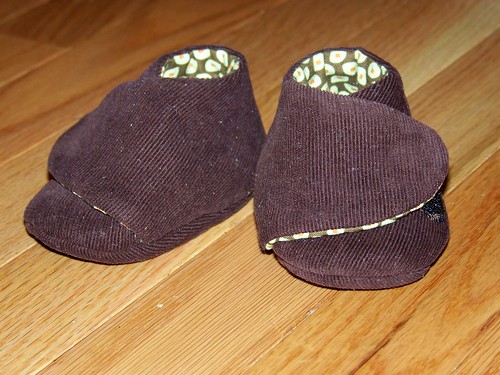
Here are a few projects from the Amy Butler "Little Stitches" book - booties and a military-style hat! Actually it's more of a little dictator hat I think! The booties are impossibly cute, I'd make more if they weren't so labor intensive. Both are a size too big for Ben right now, so no modeling pics just yet.
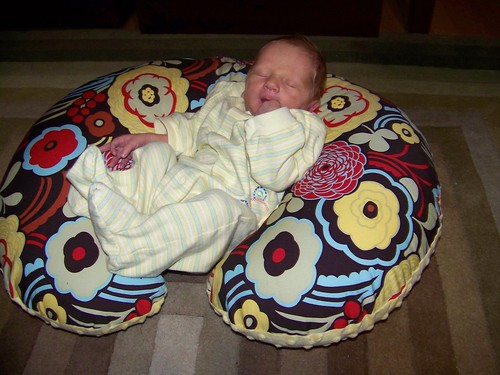
And I finally fixed my Boppy covers again - a simple project that took me way too long!
Labels:
Amy Butler,
baby booties,
boppy cover,
Little Stitches,
Military hat
Wednesday, September 3, 2008
It's September and my due date is quickly approaching!
With getting the house ready for the new baby (how do babies have so much laundry???) and me getting tired again, I'm not sure what if any sewing projects I'll be able to get done this month. But at least I'm caught up on my must-do's:
I've really been sewing a ton these last several months, so you might see me dip back in the past a bit and showcase some of those projects. :)
- my photo scrapbooks are done up to January 2008 (a huge improvement since I left them at October 2006 for over a year)
- my diaper bag is done (a huge project but a great sense of accomplishment!)
- my new covers for my Boppy pillow are done (one of those projects that isn't on a to do list, but suddenly appears and MUST be done ASAP!)
- all the pillows, valance, etc. for the basement & bathroom are done
- all the projects for DS's new room are done (valance, big nap pillow, body pillow)
- I sewed on a button for DH ;)
I've really been sewing a ton these last several months, so you might see me dip back in the past a bit and showcase some of those projects. :)
Sunday, August 31, 2008
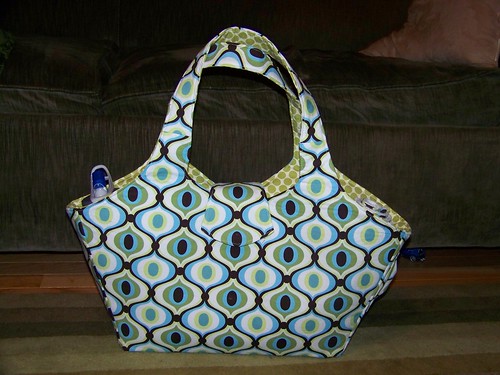
My new diaper bag is done finally!
What a project this was!
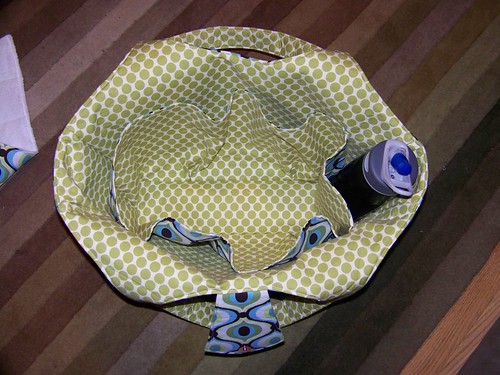
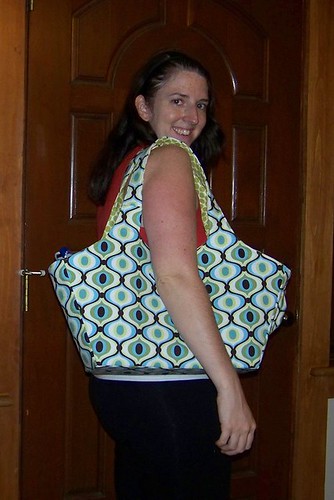
I finished my new diaper bag late last night. It's the Modern diaper bag from Amy Butler's Little Stitches book. It's HUGE - I actually scaled it down 25% (except I kept the depth of 4", so there was lots of fiddling with the measurements before I even began) and now it's a perfect size for me. I think there were 50+ pieces to cut out, it was not simple or quick!
It has a magnetic tab closure, a cell pocket on the outside end, 4 interior pockets (I think I pleated these wrong, oh well) which are large enough for my diapee & wipee case, water bottle, etc.
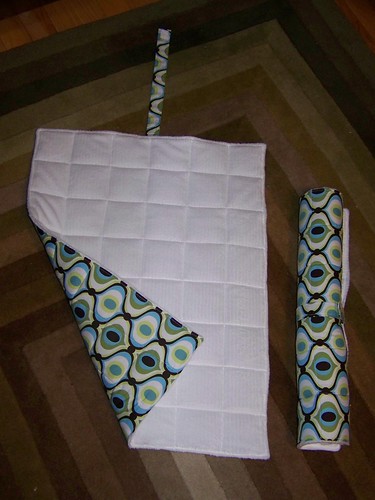
I also made the matching changing pads (also from the book). I used this super soft minkee-type fabric and they are quilted. I made two so one can be in the wash and I'll still have one ready to go.
Wednesday, August 27, 2008
Spool birdie
Subscribe to:
Posts (Atom)